
Short answer: The Everest mountain flight in Nepal is a one-hour, morning-only sightseeing flight out of Kathmandu, and for a photographer the two things that decide your pictures are the light and the window glass — not the lens you own. Every passenger on the full package gets a window seat, the aircraft runs east along the Himalayan wall with Everest framed in the windows for roughly ten minutes, and the whole schedule departs early enough to catch raking morning light on the glaciers. Take a polarising filter, shoot in burst mode, expose for the snow rather than the sky, and you will come home with frames covering more than a dozen named peaks, Everest at 8,848.86 m among them.
- 1 hrTotal flight time, Kathmandu to Kathmandu
- 8,848.86 mEverest, photographed from a window seat
- 10 minEverest held in the windows
- $260Full window-seat package, 2026
There are two ways to photograph the Himalaya from the air over Nepal, and they behave nothing like each other. A helicopter can hover, reposition, and in some cases fly with a door open, which is why the best Everest helicopter photographs look as though they were taken from a moving balcony. The Everest mountain flight is the opposite discipline: a fixed-wing sightseeing flight of about an hour, Kathmandu to Kathmandu, operated on the kind of aircraft that normally does short domestic hops, with every passenger assigned a window seat and the entire event — take-off, the run along the range, the turn, the landing — contained inside a single morning.
That difference decides almost everything about how you should shoot it. You cannot move. You cannot ask the pilot to circle. You are photographing through glass, at cruise speed, with the composition set by a track that is flown every clear morning of the year. What you can control is your settings, your glass technique, and your knowledge of the order in which the peaks appear — and those three things are worth more than any lens you could buy on the way to the airport.
This guide deals with the photography specifically: what the flight gives you, which side of the cabin the mountains end up on, how to kill window reflections, which settings survive snow and a moving aircraft, and the peak-by-peak shot list in the order the aircraft actually flies it. The fares, airline by airline, live in our Everest mountain flight cost and price guide, and the full breakdown of what the product includes sits in our scenic mountain flight guide. Every altitude and price quoted here is one already published on this site. Nothing is estimated, and nothing is rounded up to sound better.
What the Flight Actually Gives a Photographer
The aircraft climbs north-east out of Kathmandu, turns, and runs east along the wall of the Himalaya, holding a track that keeps the high peaks in the windows before banking back toward the valley. Airlines operating the service use Beechcraft 1900D and ATR-72 class aircraft, and they block out one side of the cabin so that nobody ends up staring at the back of a seat: the view is the product, and a window seat is guaranteed for every passenger at $260 on the full package. Nothing about the flight is left to a seating lottery, which for a photographer is the single most important line in the brochure.
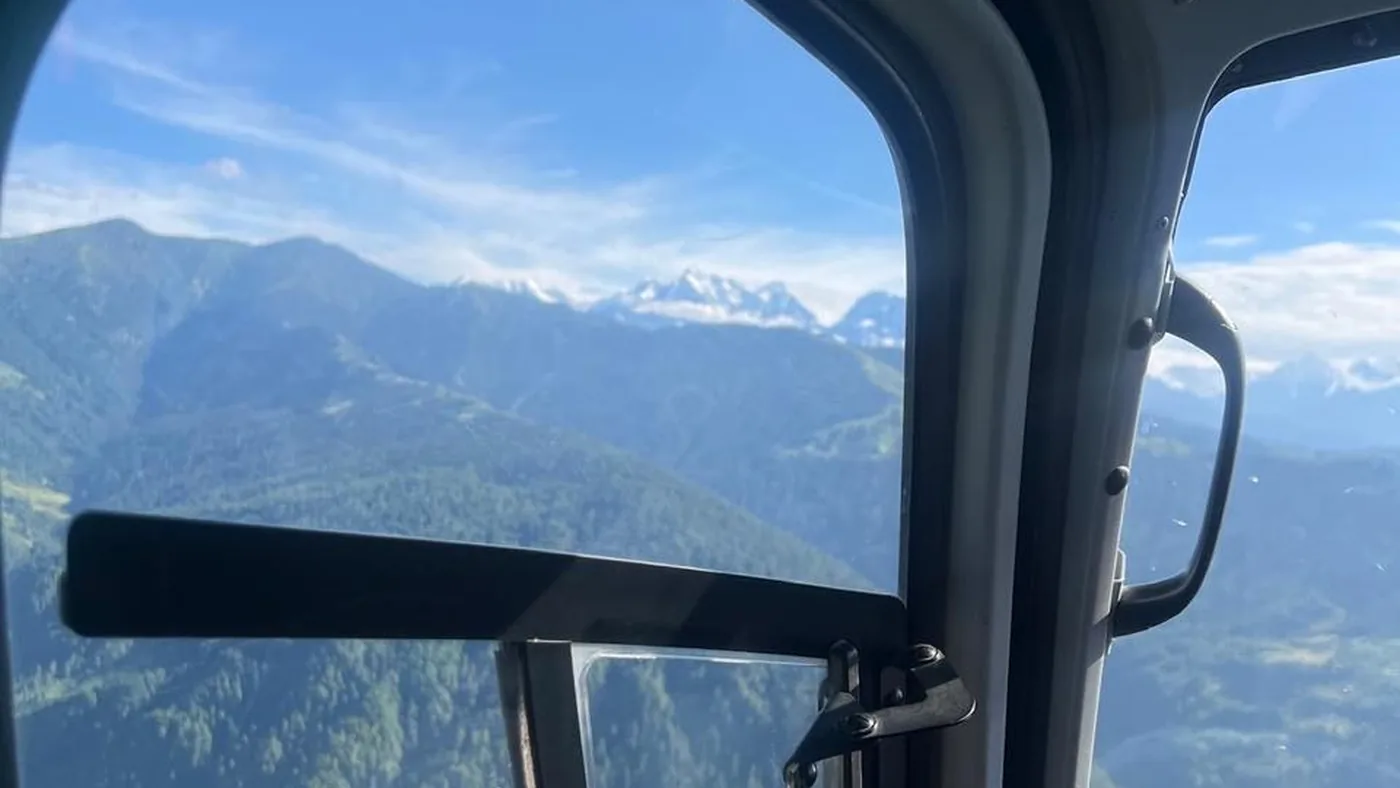
Two consequences matter before you pack anything. The first is that you will be comfortable. This is a pressurised cabin, not an open door at 5,000 m: no wind, no cold hands, no oxygen mask. That helps you hold a camera steady and it helps your battery life, but it does nothing for your image quality on its own. The second is that you will never land. The flight is a viewing circuit, not a transfer and not a landing tour — there is no stop at Everest Base Camp, no touchdown at Kala Patthar, no moment when you step onto gravel and shoot from the ground. If that is what you are picturing, the aircraft you want is a helicopter and the product you want is an Everest Base Camp helicopter day tour, which lands at 5,545 m. This article is about the plane, and about making the most of the twenty to thirty minutes of that hour when everything comes together.
Practically, that means you should board with a plan rather than a hope. Know the order of the peaks. Know which lens stays on the body for the whole flight. Know which three or four frames you are actually there for, because the ten minutes in front of Everest pass at exactly the same speed as the other fifty, and passengers who spend the first half-hour fiddling with menus normally spend the second half-hour regretting it.
Why the Light, Not the Lens, Decides Your Photographs
The schedule is built around light and safety in equal measure. Mountain flights leave Kathmandu early in the morning, with hotel pickups typically between 6:00 and 7:00 and departures clustered in the early morning window; you are normally back at your hotel by mid-morning. That timing is the reason the photographs work. Morning air over the Himalaya is stable and clear, the sun sits low, and low sun rakes across the glaciers rather than flattening them from overhead — which is exactly what puts relief into ice, edge into ridge lines, and a plume of spindrift on a summit that a midday photograph would render as a flat white triangle.
It also means the light does not last. The prime photography window on this flight is the middle stretch, when the range steepens toward Gaurishankar and Cho Oyu and the morning sun throws the crevasses into sharp relief; that is the section the captain and guide will tell you to shoot, and it arrives sooner than most passengers expect. By the time haze and convective cloud have built over the middle hills, the aircraft is already back on the ground. You are not racing the weather so much as riding it at the one hour of the day when it is on your side.
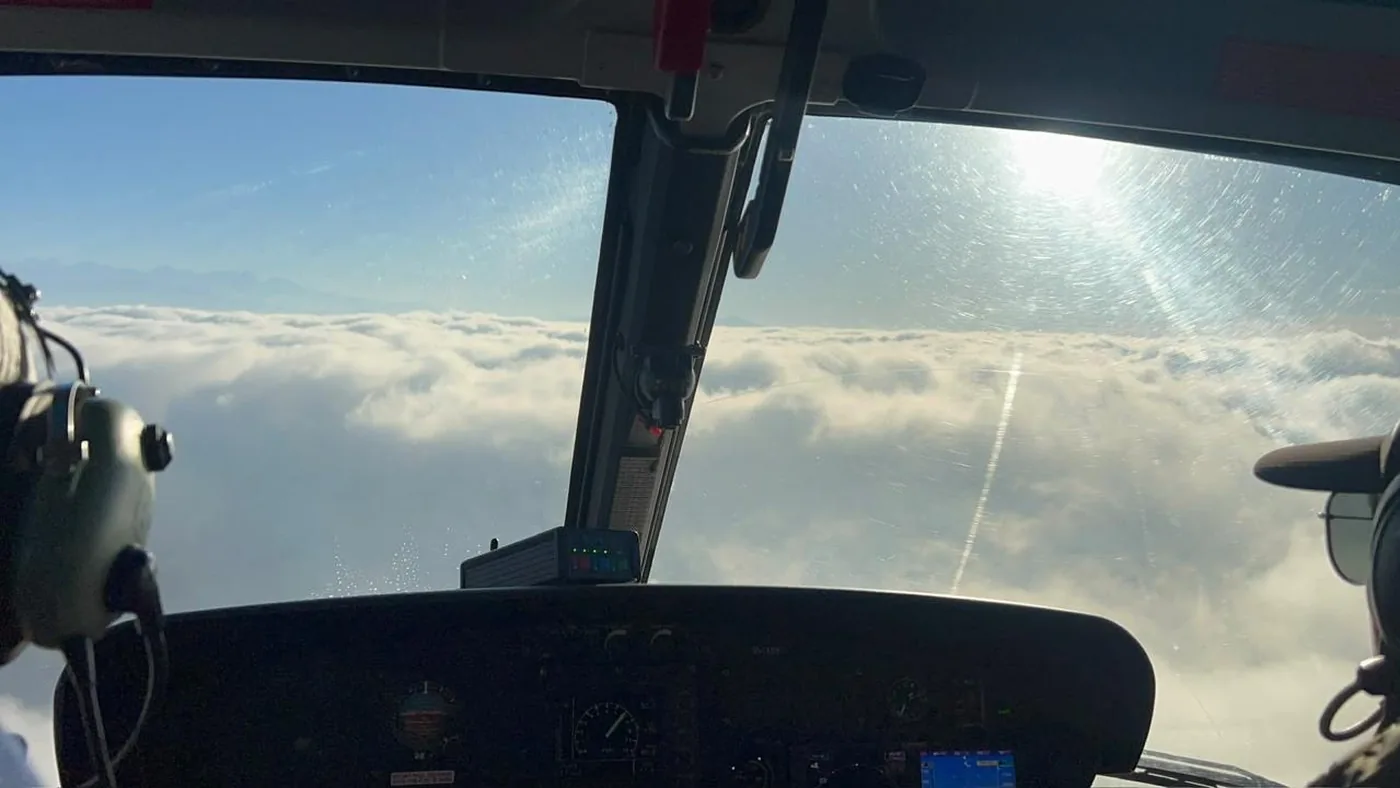
Season changes the character of that light more than any piece of equipment you can buy. Post-monsoon air is the cleanest of the year and autumn mornings are the most reliable, which is why October and November are the months photographers aim for. Spring mornings are usually clear until the haze builds, with warmer light and more dramatic cloud. Winter is colder on the tarmac but frequently offers the sharpest air of the year and the deepest snow coverage on the peaks. Monsoon is the gamble: flights still operate, and a first-light departure can climb above cloud that has the valley socked in, but the odds of a clean wall of peaks drop sharply.
| Season | Morning light and air | What it means at the window |
|---|---|---|
| September to November | Best of the year — post-monsoon air scrubbed clean | Sharpest long-range detail; Everest and Makalu separated cleanly from the haze line |
| February to May | Excellent — clear mornings, warmer light, more cloud | Dramatic skies behind the peaks; haze builds sooner, so shoot early in the hour |
| December to January | Good but cold — often the clearest air of the year | Deepest snow cover and the most sculptural ridge lines; gloves matter on the tarmac |
| June to August | Monsoon — clear windows at first light only | Cloud can hide the summit entirely; treat any clean morning as a bonus, not a plan |
The takeaway is not complicated. Book the flight for an autumn or spring morning if you have the choice. Whatever month you fly, arrive with the settings you intend to use already dialled in, because the light you came for is a moving target and the aircraft does not slow down for it.
Which Side of the Cabin Do the Peaks Appear On?
This is the question every photographer asks, and the honest answer is that the aircraft is flown so the question matters less than you think. On this route the plane runs up one side of the Himalayan range and returns along the other, banking through the turn so that both columns of windows get a clear view; when Everest itself comes into range the aircraft holds the view long enough for both sides of the cabin to photograph it. Add the fact that the airline blocks out one side of the cabin to give every passenger a window, and the practical conclusion is that there is no bad seat on this flight.
There is still a right way and a wrong way to behave. Do not spend the first half of the flight craning across a stranger to shoot out of the opposite window; you will lose your own side and gain nothing but a sore neck and a cabin full of annoyed people. Instead, set yourself up to cover both: wide lens on the camera for your side of the cabin, phone in hand for the opposite side when the aircraft banks, and a fixed plan for the ten minutes of Everest, when the peaks appear on one side on the outbound leg and on the other after the turn.
Seat position within the row matters slightly more than which side you are on. Forward of the wing gives a cleaner field of view and keeps the engine nacelle and propeller arc out of your frame; over or behind the wing puts structure and, on a high-wing aircraft, the wing itself into the picture. If you have the chance to board early and pick, take a window as far forward as you can get. If you cannot, shoot anyway: at the distances involved, a propeller in the corner of a frame is a small price for the range outside it.
Shooting Through Window Glass: The Rules That Fix Most Bad Photos
Most disappointing mountain-flight photographs are not underexposed, out of focus, or taken with the wrong lens. They are taken through glass, at a bad angle, with the cabin reflected in the pane. Fix the glass and the rest of the technical work becomes easy, because the scene you are photographing is bright, contrasty, and moving slowly enough to be predictable.
Use a polarising filter. Aircraft windows scatter light in ways that no lens coating can fix, and a polariser is the single most effective accessory on this flight: it cuts window glare dramatically and deepens the blue behind the snow line. Screw it on before boarding. You will lose roughly a stop of light, which is irrelevant when you are photographing snow in full sun, and you will gain detail you cannot recover in editing.
Kill the reflection before you shoot. A black cloth, a dark jacket, or a folded fleece pressed around the lens barrel blocks the light bouncing off the cabin interior back into the pane. A deep lens hood held flat against the glass does the same job more precisely. Shoot with the lens as close to the window as you can get without touching it — contact transmits airframe vibration straight into your frames.
Shoot across the glass, not along it. Looking straight through the pane, perpendicular to the surface, gives you the cleanest optical path. Shooting at a steep angle down the length of the window adds distortion and turns every scratch and smudge into a visible line across the peaks.
Turn off what you do not need. Flash is useless at these distances and will bounce straight back off the glass. Cabin lighting and the reflection of a bright seat-back screen can also register in a frame if you shoot with your lens close to the pane, so keep your own screen dim and shield the window with your body.
Shoot in bursts through moving glass. Burst mode beats single frames every time on a mountain flight: the aircraft is moving, the peaks are passing, and the best frame in a run of eight is usually the one you would not have chosen deliberately. Two published tips from our helicopter side of the house apply just as well here — a polariser for window glare, and burst mode over single frames. On a plane, add a third: keep the shutter fast enough that your own hand-shake, magnified by a long lens, never becomes the limiting factor.
Camera Settings for Snow, Sky and a Moving Aircraft
Snow is the hardest common subject in photography, and from a window seat above the Himalaya you have the hardest version of it: a white mountain against a bright sky, behind glass, from a moving platform. The camera's meter wants to make that snow grey. You want it white, with structure in the ice and a summit ridge that reads as rock rather than as a silhouette.
The settings below are starting points we hand to guests, not universal laws. Check your histogram after the first few frames and correct from there — every camera meters differently, and a phone will do a great deal of this work for you automatically.
| Subject | Shutter | Aperture | ISO | Why |
|---|---|---|---|---|
| Everest at the ten-minute window | 1/1000 s | f/8 | ISO 200 | Freezes airframe movement and preserves summit detail in one frame |
| Glacier texture and crevasses | 1/1000 s | f/11 | ISO 400 | Smaller aperture keeps the whole ice field sharp across the depth of the frame |
| Supporting peaks and ridges | 1/800 s | f/8 | ISO 100–200 | Fast enough for hand-holding, clean enough to crop hard afterwards |
| The whole range in one frame | 1/500 s | f/8 | ISO 100 | Wide-angle frames hold up at lower shutter speeds and lower noise |
| Cabin and travelling companions | 1/250 s | f/4 | ISO 400 | Interior light is far dimmer than the view outside; the two need different settings |
Three exposure habits do most of the remaining work. First, meter for the snow rather than the sky: spot-meter on a bright snowfield, or dial in roughly plus one stop of exposure compensation, then confirm that the brightest snow is sitting just below the right edge of the histogram instead of clipping to pure white. Second, shoot RAW if your camera allows it, because glass haze, blue-shadow colour casts and the enormous dynamic range of a snow line from 5,000 m and above are all easier to correct from a RAW file than from a compressed JPEG. Third, focus deliberately. Autofocus hunts against a low-contrast wall of snow and ice, so in the middle of the flight set focus manually at infinity and leave it there — at these distances everything you can see is effectively at the same focus point.
Two smaller settings are worth changing before take-off. Switch off lens stabilisation if you are shooting at fast shutter speeds through a vibrating airframe; it can fight the vibration rather than cancel it. And do whatever you can to avoid changing lenses in flight. The cabin is a closed box of dust and dry air, and a dropped lens cap or a mid-air mount change is how perfectly good photographs are lost. If you can travel with two bodies, or with one body and a phone you trust, the whole flight gets simpler.
The Peak-by-Peak Shot List, in the Order You See It
The magic of this flight is the sequence. The aircraft does not simply point at Everest and stop; it works along the entire central Himalaya from west to east, building toward the climax, and knowing the running order in advance is what separates a memory card of random white triangles from a set of photographs where you can name what you are looking at.
The first ten minutes are the climb-out: the Kathmandu Valley opening up beneath you, the brick mosaic of the old city, green terraced hillsides, and on a clear morning the white wall of the range already visible on the northern horizon. This is the stretch to shoot with the wide lens or a phone, and the stretch most photographers waste on trying to see Everest, which is not in frame yet.
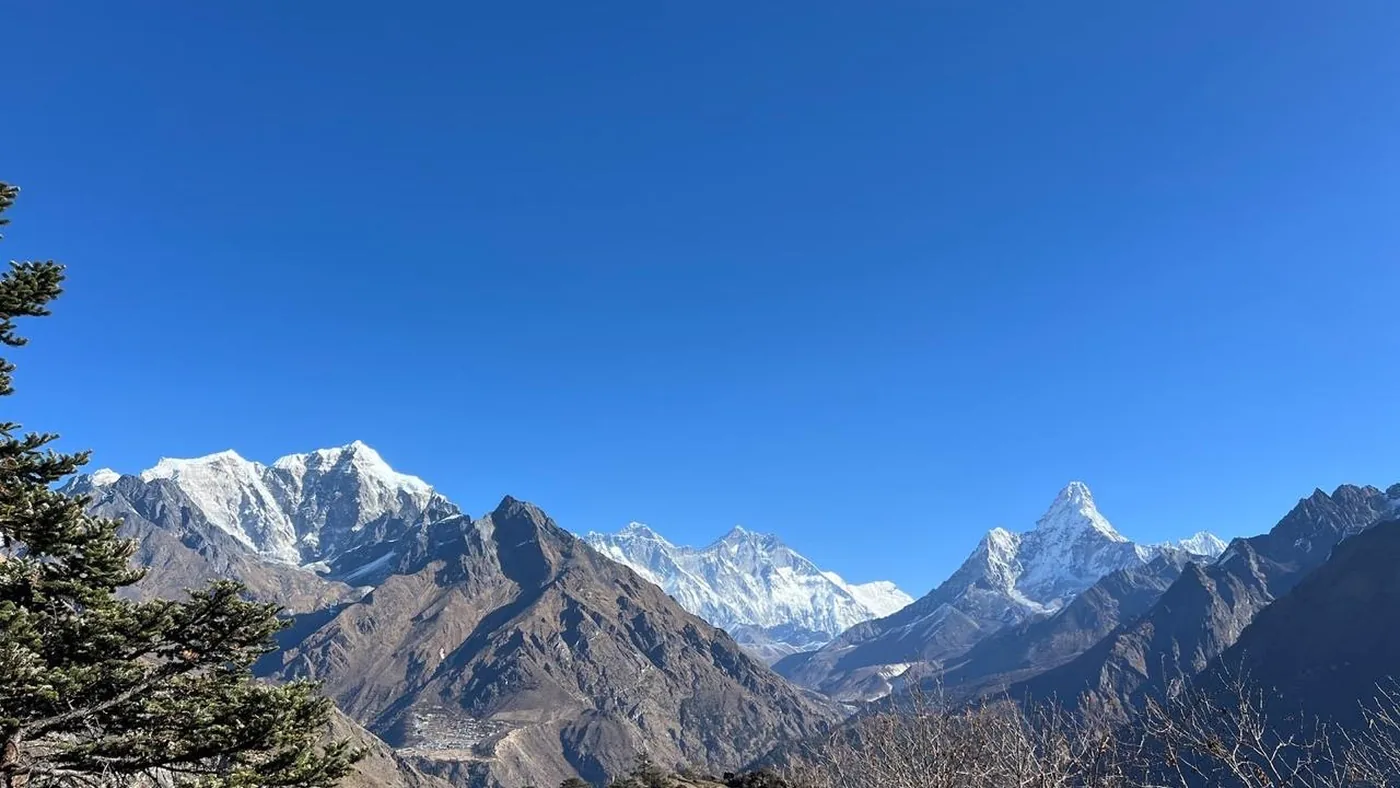
From roughly the ten-minute mark the high peaks begin: first the Langtang massif and Langtang Lirung, then Ganesh Himal, then the great white bulk of Shisha Pangma on the Tibetan line. As the range steepens you get Gaurishankar — sacred to both Hindus and Buddhists — and then Cho Oyu, whose broad, almost touchable flanks arrive with the best light of the flight. Everest itself appears in the final third of the hour alongside Lhotse and Makalu, with Nuptse's long ridge and Pumori's pyramid among the supporting cast announced by the captain in turn. After that the aircraft turns for home and the peaks recede in reverse order, handing you a second chance at anything you fumbled on the way out.
| Stage of the flight | Peaks in frame | Altitude | What to shoot |
|---|---|---|---|
| Climb-out | Kathmandu Valley, middle hills, distant range wall | Valley floor about 1,400 m | Wide frames of the valley mosaic; the first view of the snow line on the horizon |
| Early range | Langtang Lirung, Ganesh Himal, Shisha Pangma | 7,234 m / — / 8,027 m | Your first snow wall; long lens, fast shutter, burst of six to eight frames |
| Prime light | Gaurishankar, Cho Oyu | — / 8,188 m | The best light of the hour — raking sun on glaciers and crevasses |
| The climax | Everest, Lhotse, Makalu, with Nuptse and Pumori in support | 8,848.86 m / 8,516 m / 8,485 m / 7,861 m / 7,161 m | The ten minutes you came for: settle, shoot, then shoot more |
| The turn | The same peaks in reverse order | As above | Second chances, wider compositions, video of the whole panorama |
If you only remember one line from this table, make it this one: the light peaks before the mountains do. Cho Oyu and the glaciers around it arrive in the best conditions of the flight, which means the frames taken in the middle of the hour often beat the ones taken at the climax, however famous the subject. Shoot the whole run. Do not save your card for Everest and drive home with twelve frames of a peak that was half behind cloud while a perfect glacier image slipped past unrecorded.
Everest's official elevation, 8,848.86 m, is the figure recognised by both Nepal and China, and the surrounding geography is laid out in full on Wikipedia's Mount Everest entry — useful reading before the flight, because a peak you can identify in advance is a peak you can photograph deliberately.
Phone, Camera, or Both?
Bring both, and give each one a job. A modern phone handles the light up there better than it has any right to, and its wide lens is genuinely useful for the climb-out, the panorama, and the quick grab of the far window when the aircraft banks. What a phone cannot do is isolate a summit: Everest from the flight is a crop, and cropping a phone frame hard leaves you with a small file and a soft ridge. The dedicated camera earns its place through reach and through RAW files that survive editing.
Practical phone rules for the flight. Put it in flight-safe mode before boarding so it does not hunt for signal, and keep it in an inside pocket until you need it — cold air and a live screen drain a battery faster than you expect. Shoot in the highest resolution your phone offers, avoid digital zoom entirely, and if you want video, shoot video properly rather than grabbing a still from a clip later.
If you are travelling with one camera, one lens, and a phone, the lens should be a telephoto zoom rather than a wide. Wide-angle photographs of a mountain range taken from an aircraft mostly record atmosphere and empty sky; long focal lengths are what turn the Himalaya into the wall of rock and ice that travellers actually remember. A guest who brings nothing but a wide lens spends the flight wishing for reach, and a guest who brings a long zoom and a phone never misses the wide shot at all.
Video, Panning and the Ten-Minute Climax
Video is often the better souvenir and the harder craft. On a mountain flight the temptation is to film the entire hour, which produces a long clip of glass, reflections and a moving horizon that nobody watches twice. Do the opposite: film the range in short, deliberate pans of five to ten seconds, hold the camera still whenever the peaks are in frame, and let the commentary carry the moment rather than your own narration.
If you want the video to look like the view rather than like a window, use the same glass discipline as for stills: hood or cloth against the pane, no zooming mid-clip, and a slow, steady movement that stops before you think it should. Stabilisation helps here, so if you switched it off for fast stills, switch it back on for video — or shoot video on the phone, which is built for exactly this and will stabilise the frame for you.
And when Everest arrives, resist doing both at once. The published advice from the operators is straightforward: the summit sits framed in the windows for several minutes and both sides of the cabin get the shot. Use the first half of that window for stills in burst mode, then switch to video for the second half if you want moving images of the moment. Trying to alternate between a camera and a phone every fifteen seconds is how people end up with a blurry photograph and a video of their own knees.
Editing: Three Moves That Rescue Aerial Himalaya Files
Aerial Himalaya files need less editing than most people expect, but they need it in the right order. First, fix the colour of the snow. Snow photographed from the air photographs blue, partly because of atmospheric scatter and partly because a polariser exaggerates it; a modest shift towards the warm side of neutral restores white without turning the sky yellow.
Second, lift the shadows on the glaciers before you touch saturation. Crevasse detail and rock bands are almost always sitting in the darkest tones of the frame, and raising shadows there recovers structure without the cartoon look that comes from pushing vibrance. Third, use haze or clarity tools sparingly and locally. A little dehaze on the most distant summits separates Everest and Makalu from the air mass behind them; applied across the whole frame, it hardens the middle hills into an unnatural texture and makes the image look processed rather than photographed.
Then crop ruthlessly. A mountain flight frame usually contains more sky than it needs, and the photograph is almost always in the bottom two thirds of the file: the ridges, the ice, the summit pyramid. Crop to what you actually came for, and if the frame is soft because of glass or movement, delete it rather than trying to rescue it. On a flight that delivers more than a dozen named peaks in an hour, you will have plenty of better frames.
What You Cannot Photograph — and Why That Is Fine
The mountain flight will not give you a ground-level photograph of Everest Base Camp, a close frame of the Khumbu Icefall, or a summit portrait shot from a hover. There is no landing, no hovering, and no open door; the aircraft follows a fixed track at a lateral distance from the peaks, which is exactly what makes the flight safe, comfortable, and cheap relative to any alternative. If your photographs must include you standing on gravel at altitude, the product you want is a helicopter.
The comparison is honest and worth making before you book. A scenic mountain flight starts at $260 per window seat. The Everest Base Camp helicopter day tour starts at $1,260 per seat and lands at Kala Patthar, 5,545 m, with a stop at the Everest View Hotel, 3,880 m. A private Everest helicopter charter gives your group the whole aircraft from $4,500 and lets you choose the light and the timing. And if the trek up with a flight back is the shape of your trip, the Everest Base Camp helicopter trek combines the walk with a helicopter exit from $1,840. Our mountain flight versus helicopter comparison sets out which suits whom, and if photography is the only criterion, the answer depends entirely on whether you need to land.
How to Book the Flight for the Morning You Want
Morning slots are the whole product, so booking strategy is really light strategy. The flight can often be arranged as little as a day or two ahead, but in peak season — October to November and March to May — one to two weeks of lead time is sensible if you want a specific morning. Weather that grounds the flight is handled by rebooking to the next clear morning at no extra cost, which matters for photographers more than for anyone: a clear morning is not a preference on this flight, it is the entire experience.
Send us your travel dates and we will confirm a morning slot, arrange your hotel pickup, and tell you which aircraft and which side of the cabin you are on. If you would like to see the whole picture first, our Everest mountain flight guide covers the flight itself, the airlines and the local fares, while the Buddha Air mountain flight guide breaks down the aircraft and seating on the service most guests end up booking.
Frequently Asked Questions
Which camera should I take on the Everest mountain flight in Nepal?
Take the camera you can operate without looking at it, with a telephoto zoom mounted before you board. Reach matters more than sensor size on this flight, because Everest from the aircraft is a distant summit rather than a nearby mountain, and the peaks you want to isolate are far away. A phone in your pocket covers the wide views and the far window when the aircraft banks. Two small accessories earn their place: a polarising filter and a spare battery kept in an inside pocket.
Which side of the plane should I sit on for photographs?
There is no wrong side. The aircraft runs up one side of the Himalayan range and returns along the other, banking through the turn so both columns of windows get a clear view, and Everest is held in the windows long enough for both sides of the cabin to shoot it. Seat position matters more than side: sit as far forward as you can to keep the wing and propeller arc out of the frame, and shoot out of your own window rather than across a stranger.
What camera settings work best for snow and sky?
Start fast and modest: about 1/1000 s, f/8, ISO 200 for the Everest window, and adjust from the histogram. Spot-meter on the snow rather than the sky, or add roughly plus one stop of exposure compensation, so the camera does not turn the peaks grey. Shoot RAW if you can, and set focus manually at infinity once the range is in view, because autofocus hunts against a low-contrast wall of snow and ice.
Do I need a polarising filter on a mountain flight?
It is the most useful accessory you can bring. A polariser cuts window glare dramatically, which is the single biggest cause of poor mountain-flight photographs, and it deepens the blue sky behind the snow line. Screw it on before boarding rather than changing filters in a cramped cabin, and accept the roughly one stop of light it costs — you are photographing bright snow in full sun, so losing a stop costs you nothing.
Can I use a tripod on the flight?
No. A tripod is impractical in an aircraft cabin and there is nowhere to set one up, so everything is shot hand-held. The workarounds are fast shutter speeds, burst mode, and pressing the lens hood or a dark cloth flat against the window to steady the camera without touching the glass. Stabilisation can help at slower shutter speeds but should be switched off when you are shooting fast through a vibrating airframe.
Is a phone good enough for the Everest mountain flight?
For the panorama, the climb-out and the wide views, yes — and phone cameras handle bright high-altitude light better than most people expect. For Everest itself, no: the summit is a distant subject that needs reach, and cropping a phone frame hard leaves you with a small, soft file. Bring both and give each one a job, with the phone covering the second window when the aircraft banks and the camera covering the summits.
How long do I actually get to photograph Everest?
About ten minutes of the hour, held deliberately by the aircraft so that both sides of the cabin get a clean view. It arrives after the Langtang and Gaurishankar sections and after the best light of the flight has already passed over Cho Oyu and the glaciers, so do not treat it as the only moment worth shooting. Plan for it, shoot in bursts when it comes, and leave enough freedom in your settings to keep working after the aircraft turns.
Will window reflections or scratches ruin my photographs?
Only if you let them. Reflections are killed by getting the lens close to the pane and blocking the light coming from behind you with a hood, cloth or jacket; shooting straight through the glass instead of along it keeps scratches and distortion from registering as lines across the peaks. Turn off flash, dim your own screen, and choose the cleanest pane available when you board. Most mountain-flight images that disappoint were taken with the camera held well away from the window.
Should I shoot video instead of stills?
Shoot both, in sequence rather than simultaneously. Film short, deliberate pans of five to ten seconds and hold still whenever the peaks are in the frame; avoid zooming mid-clip and use stabilisation for video even if you switched it off for stills. When Everest arrives, use the first half of the ten minutes for stills in burst mode and the second half for video, rather than flapping between the two and getting neither.
What happens if the weather cancels my flight?
You are rebooked on the next clear morning at no extra cost, and refunded in full if your itinerary does not allow that. For a photographer this is a feature rather than a nuisance: the operators will not fly you into murk just to keep the schedule, so a rescheduled flight is generally a better flight. Weather cancellations are most common in the monsoon months and rare in the autumn and spring windows.
Is the mountain flight or a helicopter better for photography?
They answer different questions. The plane gives you the range as a whole — more than a dozen named peaks in an hour, for $260 per window seat — but always from a distance and always through glass. A helicopter can land at Kala Patthar, 5,545 m, stop at the Everest View Hotel, 3,880 m, and hold position for the frame you want, which is why it starts at $1,260 per seat for the shared day tour. If you want the wall of peaks, fly the plane; if you want to stand inside the photograph, fly the helicopter.
Do I have to pay extra for a window seat?
Not on the full package. The airlines block out one side of the cabin so that every passenger has a window, and the $260 product guarantees it for each passenger rather than selling the view as an upgrade. When you compare quotes, ask whether the window seat is genuinely guaranteed and whether hotel transfer is included — a cheaper fare that strips those out is not a cheaper product, it is a degraded one.
The Bottom Line
The Everest mountain flight is the most accessible way to photograph the highest mountains on Earth, and it rewards preparation more than equipment. Learn the order of the peaks, settle your settings before take-off, kill the window glare, and shoot in bursts through the ten minutes when Everest, Lhotse and Makalu are stacked in the glass. Everything else — the polariser, the RAW files, the manual focus at infinity, the dark cloth against the pane — exists to protect those few minutes from the three things that ruin aerial photographs: reflection, slow shutter speed, and a photographer still reading a manual at 7 a.m.
We are a Kathmandu-based, government-licensed operator and we book this flight for guests every week of the year. Tell us your dates and we will confirm a morning slot, arrange your pickup, and make sure you are on the right side of the aircraft with the range in your viewfinder when it matters.